Creating Revit families might sound a bit intimidating at first, especially if you’re new to Revit. But think of it as a building with digital LEGO blocks. Each block, or “family,” is a piece you can use to create detailed and customizable models for your projects. Whether it’s doors, windows, furniture, or something unique, Revit families are the building blocks of your design.
We’ll start by explaining what a Revit family creation is and why it’s an important part of your design toolkit. Then, we’ll guide you through setting up your family template, adding parameters, and modeling the geometry. We’ll also touch on how to make your families flexible and reusable by adding options for different sizes, materials, and configurations.
By the end of this guide, you’ll have a solid understanding of how to create Revit families from scratch. More importantly, you’ll see how fun and rewarding it can be to bring your design ideas to life with custom elements.

What Is Revit Family Creation?
Revit Family Creation is the process of designing custom building components in Autodesk Revit, a popular 3D modeling software. In Revit, “families” are pre-made or customized objects, such as doors, windows, furniture, or lighting fixtures, that can be used in building models.
These families contain the geometry, data, and behavior needed for specific elements in a project. With the help of custom Revit families, designers and architects can customize their building components to meet specific project needs.
This helps simplify the design process, as these components can be reused across different projects. Revit Family Creation is essential for projects that require unique or non-standard elements, allowing for greater flexibility and precision in architectural and engineering designs.
How To Create Revit Families? A Step-by-Step Guide
With the help of Revit families, you can customize these elements to fit your project’s specific needs, enhancing your overall design efficiency. Here’s a step-by-step guide to help you create Revit families from scratch.
Step 1: Basics Of Revit Family
Before diving into the creation process, it’s important to understand what Revit families are and how they fit into your project. In Revit, families are categorized into three types:
- System Families: These are pre-defined in Revit and cannot be modified or created by users. Examples include walls, floors, and roofs.
- Loadable Families: These are created outside the project environment and can be loaded into any Revit project. Examples include furniture, windows, doors, and plumbing fixtures.
- In-Place Families: These are created directly within a project and are unique to that project. They are often used for custom elements that won’t be reused in other projects.
For this guide, we’ll focus on creating Loadable Families.
Step 2: Start a New Family
1. Launch Autodesk Revit on your system
2. Create a New Family:
- Go to the “File” menu.
- Select “New,” then choose “Family.”
- A dialog box will appear, prompting you to select a family template.
3. Choose a Template:
- The template you choose determines the family’s behavior and the types of parameters you can set. For example, if you’re creating a door, choose the “Door.rft” template.
- If you’re creating something custom, you might start with a generic model template and then define the category later.
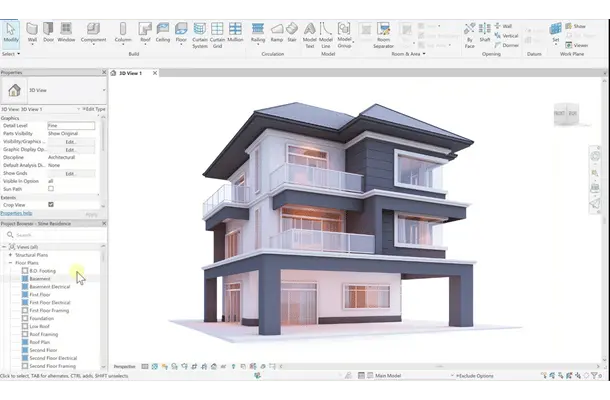
4. Set Up Your Workspace: Familiarize yourself with the interface, particularly the Family Editor, which provides tools for creating and modifying your family.
Step 3: Define Reference Plane
Reference planes are essential in Revit family creation because they serve as guides for placing and aligning components. They also help control the family’s geometry and make sure that it behaves predictably when placed in a project.
1. Create Reference Planes:
- In the Family Editor, go to the “Create” tab.
- Click on “Reference Plane” to draw planes.
- Draw horizontal and vertical reference planes to establish the center lines and boundaries of your family.
2. Name the Reference Planes: Select each reference plane and give it a meaningful name in the Properties palette. This helps keep your family organized.
3. Set Reference Planes as Strong Reference: This option makes the reference planes easily selectable when placing the family in a project.
Step 4: Create Family Parameters
Family parameters allow you to control the dimensions, materials, visibility, and other characteristics of your family. They can be instance parameters (applied to individual elements) or type parameters (applied to all instances of a family type).
1. Define Parameters:
- Go to the “Create” tab and select “Family Types.”
- In the dialog box, click on “Add” to create a new parameter.
- Define the parameter’s name, discipline, and type (e.g., Length, Material, Visibility).
2. Apply Parameters to Reference Planes:
- Select a dimension line associated with a reference plane.
- In the options bar, click on the “Label” dropdown and choose the parameter you created. This ties the dimension to the parameter, allowing for flexible adjustment.
Step 5: Create Geometry
Now that your reference planes and parameters are in place, you can start creating the actual geometry of your family.
1. Choose a Geometry Tool: In the “Create” tab, choose a tool like “Extrusion,” “Blend,” “Revolve,” or “Sweep” to create your family’s geometry.
2. Draw the Geometry: Use the selected tool to draw the shape of your family component. For example, if you’re creating a chair, you might use the “Extrusion” tool to create the seat and backrest.
3. Align Geometry to Reference Planes: Use the “Align” tool to align your geometry to the reference planes. This ensures that the geometry adjusts properly when parameters are modified.
4. Set Materials: With the geometry selected, go to the Properties palette and assign materials. You can link materials to parameters, allowing users to change materials in the project environment.
Step 6: Create Family Types
Family types are variations of a family with different parameter values. For example, you could create different sizes of a door within a single family.
1. Open the Family Types Dialog: In the Family Editor, go to the “Create” tab and select “Family Types.”
2. Create New Types: Click “New” to create a new type. Name it according to the variation it represents (e.g., “36×80 Door”). Now, modify the parameters for this type (e.g., height, width).
3. Add More Types: Repeat the process to create additional types as needed.
Step 7: Add Connectors (for MEP Families)
If you’re creating a family for mechanical, electrical, or plumbing (MEP) systems, you’ll need to add connectors so that the family can interact with Revit’s systems.
1. Go to the Create Tab: Choose “Connector” and select the appropriate type (e.g., Electrical, Duct, Pipe).
2. Place the Connector: Place the connector at the appropriate location on your geometry.
3. Set Connector Parameters: Define the connector’s flow direction, system classification, and other parameters in the Properties palette.
Step 8: Save and Organize Your Family
Once your family is fully functional, it’s time to save it.
1. Save the Family:
- Go to “File” and select “Save As.”
- Save your family with a clear and descriptive name.
2. Organize Your Families: Store your family in a structured folder system, categorized by type or project, so it’s easy to find and reuse in the future.
The Final Thoughts
To sum it up, creating Revit families may seem tricky at first, but with practice, it becomes an essential skill for any Revit user. By making your own families, you can add unique elements to your projects and work more efficiently. Remember to start simple and build on your skills over time.
Creating custom families allows you to customize Revit to your specific needs and design style. It gives you more control over your projects and can save you time in the long run. As you become more comfortable with family creation, you’ll find yourself able to bring your design ideas to life more easily in Revit.