
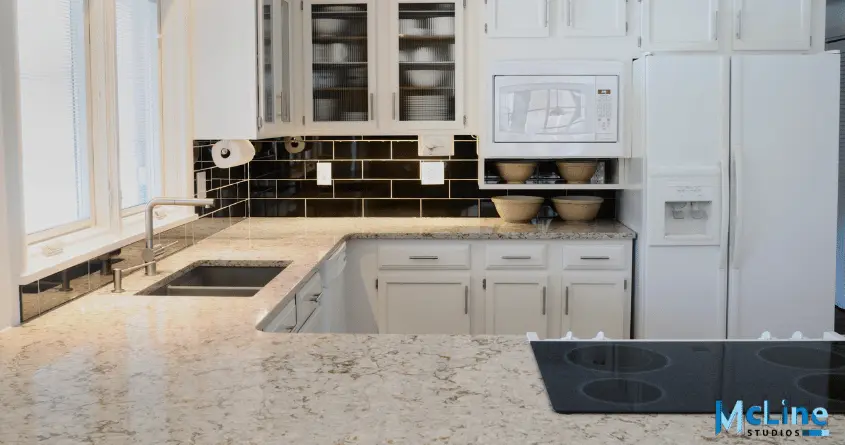
If you’re building a kitchen or bar, countertop shop drawings can be an essential tool for your construction process. Countertop shop drawings serve as the blueprint for one of the most functional and visually impactful components of a kitchen, bathroom, or bar.
These drawings help in communicating all the necessary dimensions, cutouts for sinks and appliances, edge details, and any unique design elements to the fabricator. Without these clear shop drawings, costly mistakes can occur during the fabrication and installation process.
In this comprehensive guide, we will explore what countertop shop drawings entail, their essential components, and step-by-step instructions for drawing them effectively.
What Are Countertop Shop Drawings?
Countertop shop drawings are detailed plans created for the fabrication and installation of countertops in the kitchen, bathroom, or bar.
These drawings serve several critical functions, including guiding the production process, assuring precise measurements, and facilitating clear communication among designers, fabricators, and installers.
What Should Countertop Shop Drawings Include?
Here is the breakdown of what countertop shop drawings include:
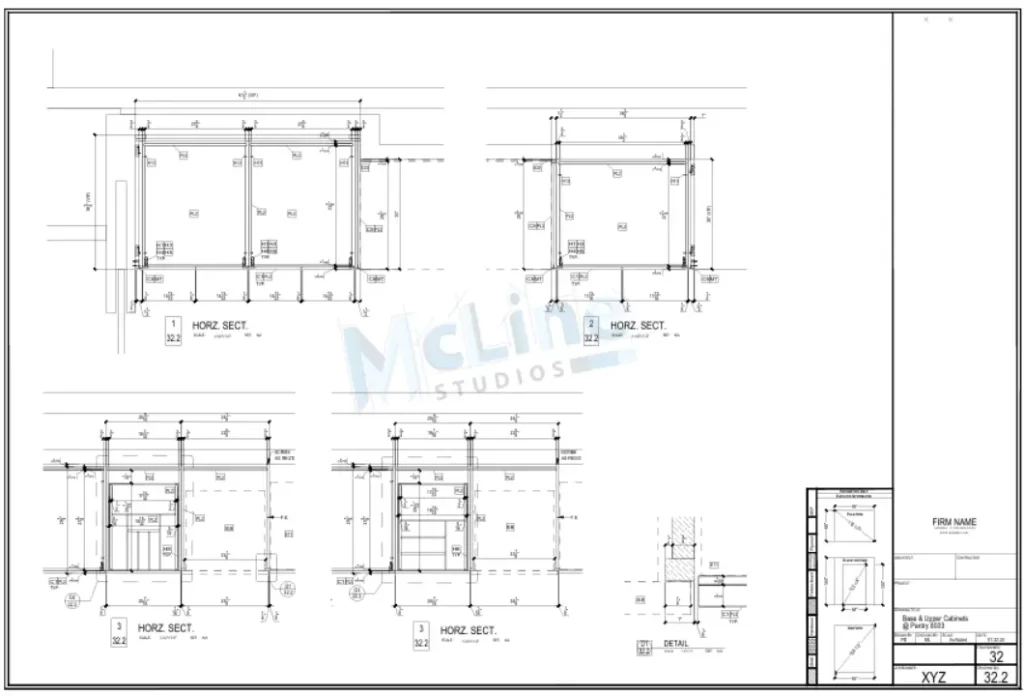
Dimensions and Layouts:
- Exact measurements of the countertop, including length, width, thickness, and edge profiles.
- Layout of the countertop about the room, showing how it fits with cabinetry, walls, and other structures.
Material Specifications:
- Details on the type of material to be used (e.g., granite, quartz, laminate, solid surface).
- Information on color, pattern, and finish.
Edge Profiles:
- Detailed illustrations of the edge treatments, such as bullnose, beveled, or ogee edges.
- Specifications on the radius or shape of custom edges.
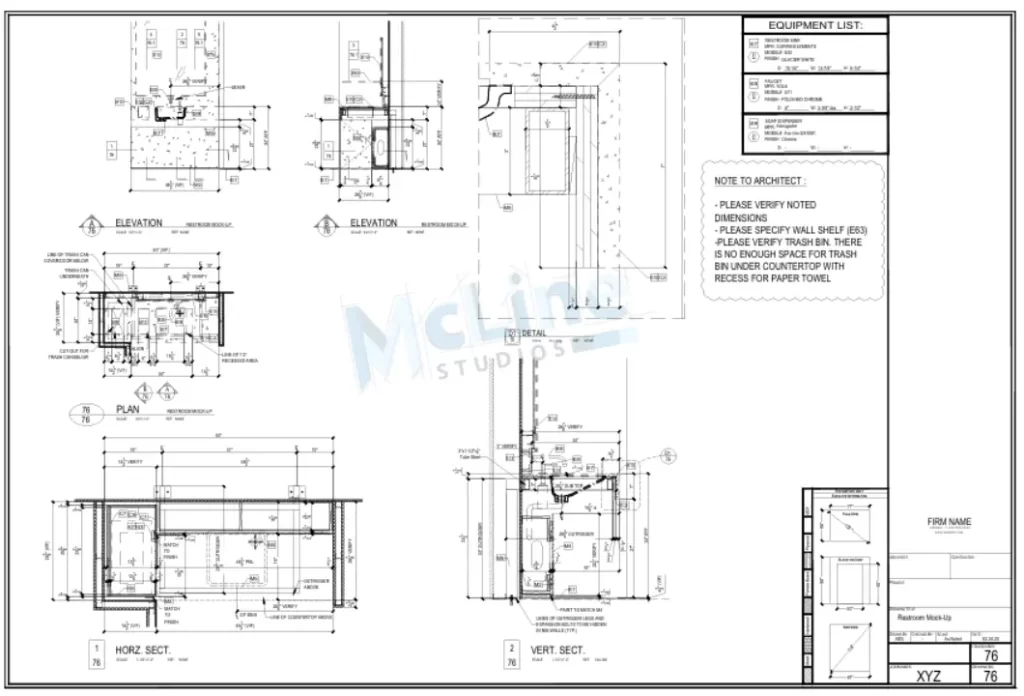
Cutouts and Sink Openings:
- Exact locations and dimensions of cutouts for sinks, faucets, cooktops, and other fixtures.
- Special instructions for undermount or drop-in sink installations.
Backsplashes and Overhangs:
- Measurements and design details for backsplashes, including height and any decorative elements.
- Specifications for countertop overhangs, especially for seating areas or bar tops.
Seams and Joints:
- Locations and treatment of seams and joints, including mitered edges or butt joints.
- Instructions for seam placement to ensure structural integrity and aesthetic appeal.
Special Features:
- Details on any integrated features such as drainboards, built-in trivets, or custom inlays.
- Specifications for any special treatments, such as waterfall edges or integrated lighting.
Installation Details:
- Guidelines for installation, including anchoring methods, supports, and brackets.
- Instructions for leveling and securing the countertop.
Tolerances and Clearances:
- Specifications for acceptable tolerances in measurements to ensure proper fit.
- Details on required clearances around appliances, cabinets, and walls.
Annotations and Notes:
- Additional notes and annotations to clarify specific instructions or highlight important details.
- Labels for different parts and components for easy identification during fabrication and installation.
Step-By-Step Instructions To Create Countertop Shop Drawings
It is always recommended to take the help of a professional draftsperson or drafting service provider while creating any type of shop drawing. The creation of countertop shop drawings involves several steps, from initial measurements to final detailing. Here’s a step-by-step guide:
Step 1: Gather Necessary Information
- Measurements: Obtain accurate measurements of the countertop area. Include dimensions for all sides, openings, cutouts (for sinks, cooktops, etc.), and any overhangs.
- Materials and Finishes: Note the type of material (e.g., granite, quartz, laminate) and any specific finish or edge treatments.
- Client Requirements: Gather any specific requirements or preferences from the client, including backsplash height, seam locations, and edge profiles.
Step 2: Set Up Your Drafting Software
- Open Software: Launch your drafting software (recommended AutoCAD).
- Create a New Project: Start a new project or drawing file.
- Set Units: Ensure the drawing units match your measurement units (inches, millimeters, etc.).
Step 3: Draw the Countertop Outline
- Base Outline: Use the “Line” or “Polyline” tool to draw the perimeter of the countertop. Start by drawing the main shape based on your measurements (rectangular, L-shaped, U-shaped, etc.).
- Add Cutouts: Use the “Rectangle” or “Circle” tool to add cutouts for sinks, cooktops, and other fixtures. Position these cutouts accurately based on the measured distances from the countertop edges.
Step 4: Add Details
- Edge Profiles: Use the appropriate tool to add details for edge profiles (beveled, bullnose, ogee, etc.). If your software has libraries or blocks for standard edge profiles, use them for accuracy.
- Backsplash: Draw the backsplash by creating a secondary outline along the edge where it will be installed. Indicate the height and any specific design features.
- Seams and Joints: Use dashed lines to indicate the location of seams. Add notes specifying seam details, such as joining techniques or required adhesive.
Step 5: Annotate the Countertop Shop Drawings
- Dimensions: Use the “Dimension” tool to add dimensions to all relevant parts of the drawing. Include lengths, widths, cutout dimensions, and distances between features.
- Labels and Notes: Label all cutouts (e.g., “Sink Cutout,” “Cooktop Cutout”). Add notes specifying material type, edge treatments, and any other pertinent information.
Step 6: Create Sections and Elevations (if needed)
- Section Views: Draw section views to show the countertop thickness and edge profile details. Use the “Section” tool or manually draw cross-sections and annotate them.
- Elevation Views: Provide elevation views if needed to show the relationship between the countertop and other kitchen elements (e.g., cabinets, and appliances).
Step 7: Finalize and Review
- Review: Double-check all measurements and details for accuracy. Ensure all necessary information is included and presented.
- Adjust: Make any necessary adjustments based on your review.
Summary
Countertop shop drawings are detailed blueprints crucial for the fabrication and installation of countertops in kitchens, bathrooms, or bars. These drawings ensure precise measurements, clear communication, and accurate execution, minimizing costly errors.
Essential components of these drawings include dimensions and layouts, material specifications, edge profiles, cutouts and sink openings, backsplashes and overhangs, seams and joints, special features, installation details, tolerances and clearances, and annotations and notes.
If you still have questions about countertop shop drawings, feel free to contact us.