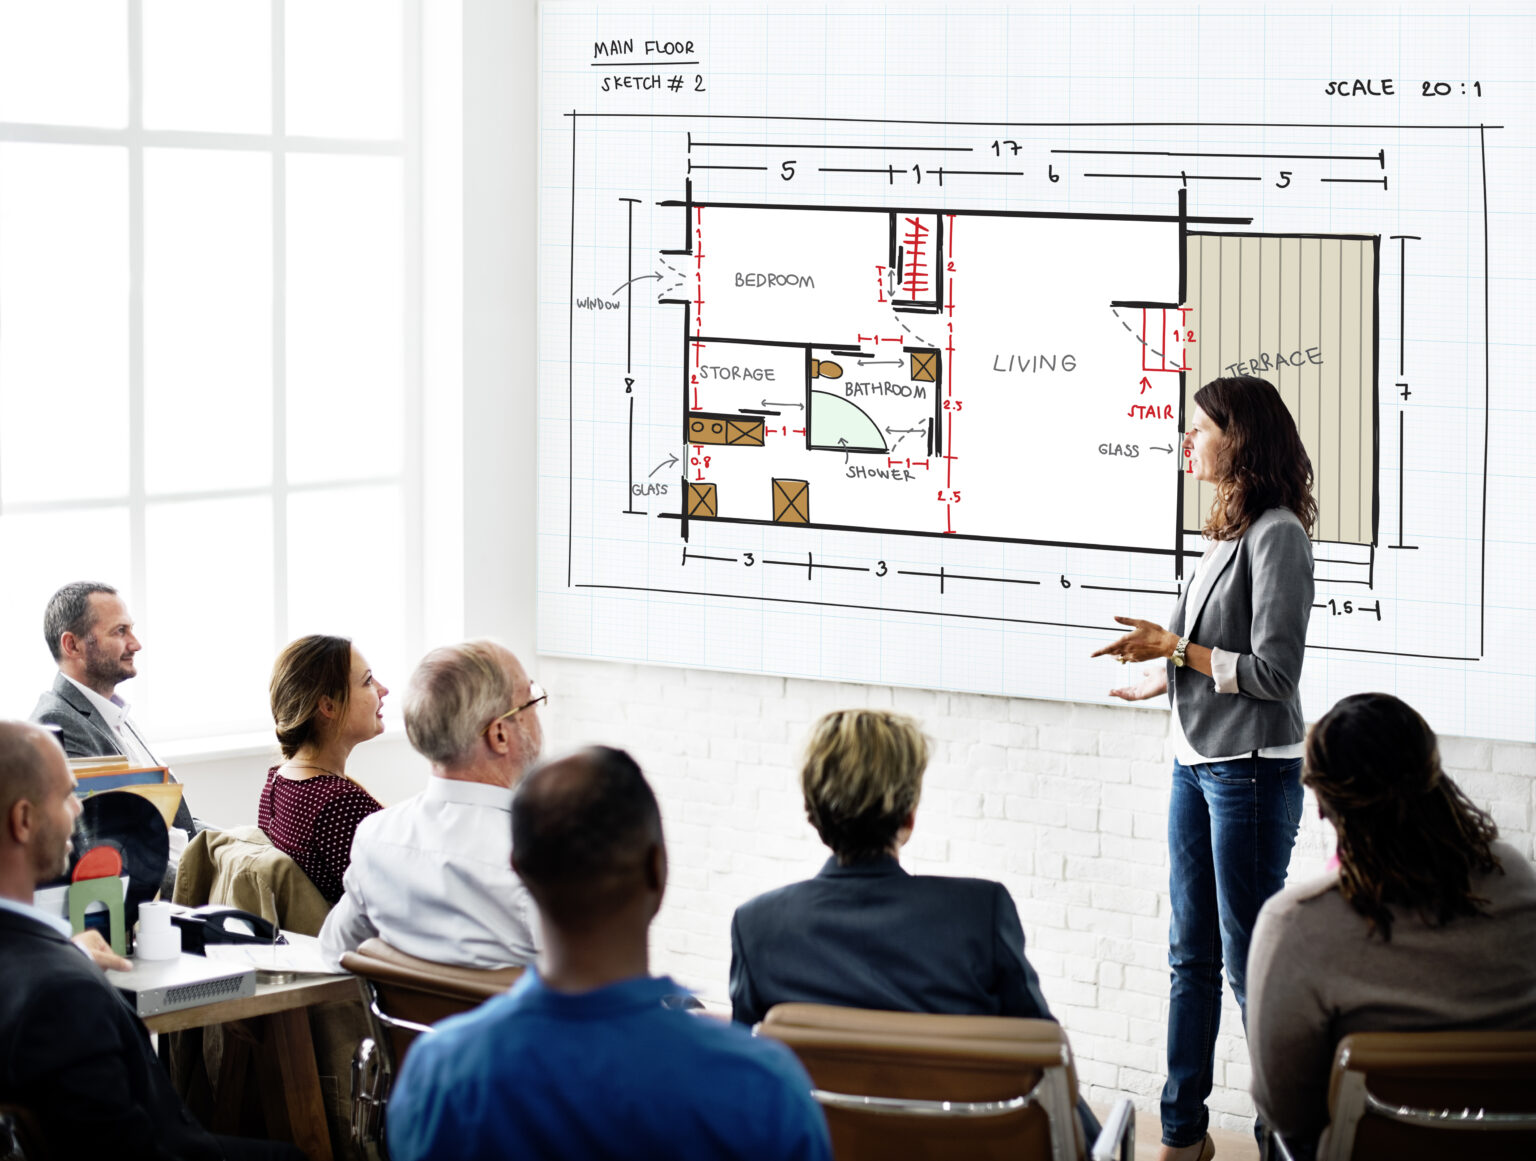




Before you can renovate a commercial building, you need to know what is actually inside it. That sounds simple, but it is often the hardest part. The original plans may be old. Past changes may never have been drawn. And the real on-site measurements may not match the drawings at all. If a team designs a new layout without knowing the true conditions, the plan can fall apart once work begins.
This is where Architectural Drafting Services can help. A drafting team takes your field measurements, site notes, photos, and old records, and turns them into clear, usable drawings. For architects and contractors working on commercial renovations, this gives everyone a solid starting point for planning and coordination. McLine Studios offers these services to support drawing and documentation needs on commercial projects.
But good documentation takes more than a few quick measurements. Teams need a clear process. They need to know what the project requires, check the information they already have, note anything that does not match, and then prepare drawings that work together. In this article, we will help readers understand how to document existing conditions for commercial renovation drawings. We will move in a step-wise manner and go to every point, including what information to collect and organise before the drafting process.
Why Existing Site Information Must Be Organised Before Drafting
Commercial buildings change a lot over the years. Walls get moved. Doors get replaced. Ceilings are lowered or reworked. Pipes, wires, and vents are added or updated. Many of these changes never make it onto the original drawings. That is why old drawings alone can cause trouble. A new wall might run into a column nobody knew about. A new door opening might not fit the real wall behind it. A change to the ceiling might block air-conditioning equipment hiding above it.
Accurate existing conditions drawings help your team see the building as it really is today, before any new layout is planned. They also give Architectural Drafting Services teams a reliable base to work from when they prepare renovation drawings.
Good, organised documentation helps teams to:
- Spot differences between the old drawings and the actual site.
- Notice structural and design limits early.
- Plan around the building services you can see.
- Feel more certain while preparing drawings.
- Explain site conditions clearly to contractors and consultants.
9 Steps that You Should Follow
- Define the Documentation Scope Before Visiting the Site
You will need different documentation for every new renovation project. This is because every renovation project is different from others. A small office change might only need floor plans and door measurements. A bigger renovation may also need elevations, sections, ceiling plans, and notes for working with other teams. Before you visit the site, decide what your team needs to document. This is an early and important step in any Architectural Drafting Services workflow. The detailing of the final drawings and what you gather from the project is dependent on the project scope.
Follow the simple scope checklist:
- Project address and building name or ID.
- Floors and rooms that are part of the renovation.
- Elevations and sections that you need for the project.
- Areas that need measuring before we start.
- Building services that could affect the new layout.
- Drafting standards and deadlines.
The checklist you prepare must match all your project needs. Make sure it is not a one-size-fits-all version. For an office renovation, you need room sizes, wall positions, door openings, and ceiling details. A checklist that ignores these details won’t help you plan properly. Think about what you need for this space, not what someone else used for their project. Every renovation is different. So your list should reflect that. It should include everything that shows up in the layout. That means taking measurements, noting where doors go, and planning ceiling heights. If you skip this, you might end up with a space that doesn’t fit your needs. So take your time. Build a list that fits your project; defining these requirements early helps the field team prioritise the information needed for drawing production and allows Architectural Drafting Services providers to understand the expected deliverables.
- Plan Site Access and Prepare a Field Documentation Checklist
Getting into the building is a big part of documenting a commercial space, especially if people are still working there during planning. Some areas may need permission, tenant approval, a security pass, or someone to walk you around. Mechanical rooms, electrical rooms, rooftops, and other service spaces may not be open during a normal visit.
A clear checklist helps make sure nothing gets missed. Here is a simple one you can use:
| Rooms | Room names, locations, and overall sizes |
| Walls | Locations, thickness, and any visible offsets |
| Doors | Opening sizes, locations, and which way they swing |
| Windows | Sizes, positions, and sill heights if needed |
| Ceilings | Heights, soffits, and anything in the way |
| Floors | Level changes, steps, and transitions |
| Columns | Locations and visible sizes |
| Building services | Visible air-conditioning, plumbing, and electrical items |
Not every item applies to every project. Your team should pick the ones that fit the renovation scope. Clear site records also help Architectural Drafting Services teams avoid guessing when they prepare drawings.
- Establish a Consistent Field Measurement Reference
Any renovation layout depends on reliable field dimensions. It is advisable to use the same reference system throughout the process. Start with fixed points that will not change, such as structural grid lines, permanent wall corners, or other features that are part of the building. Then measure from those points every time.
Your measurement list should include:
- Overall room width and length
- Each wall segment
- Wall thickness, where you can reach it
- Door and window opening sizes
- Distances between openings and nearby walls
- Floor-to-ceiling heights
- Column locations and sizes
- Changes in floor level
- Ceiling offsets and soffits that matter to the project
How to Cross-Check Field Dimensions Before Drafting
Do not trust a single measurement when you can check it another way. Say you measure a room as 30 feet wide. Now measure each wall segment and add them up. If the total comes to 29 feet 8 inches, find out why. Do not quietly fix the number to make it fit.
Here is a simple way to check your work:
- Write down the overall measurement.
- Measure each segment on its own.
- Add up the segments, then compare the segments with the number.
- Recheck openings and check places where walls meet.
- Note any measurement you could not confirm.
- Record how you measured and anything that limited you.
How exact you need to be depended on how the drawings will be used. Basic space planning and detailed construction coordination do not need the same level of detail. If your project needs tighter limits, agree on them with the team before the site visit.
For large or complex buildings, laser scanning can help capture a lot of information quickly. But scan data still needs to be reviewed, understood, and prepared before it can be used for drawings. If you want to learn more about this method, see Point Cloud to BIM for Existing Buildings.
- Record Site Conditions That Can Affect Renovation Layouts
Numbers do not tell the whole story. A building may have odd wall angles, uneven surfaces, parts of the structure that stick out, low ceilings, or equipment that affects the new layout. Write these things down in enough detail that the design and drafting teams can see how they will affect the plan.
Pay close attention to:
- Columns and other parts of the structure that stick out
- Wall offsets and uneven corners
- Door and window setups
- Stairs, ramps, and changes in floor level
- Lowered ceilings, bulkheads, and soffits
- Fixed equipment and built-in features
- Visible finishes, where they matter
- Open space around existing building elements
Here is an example. A new office partition may look easy on a floor plan. But once you are on site, a ceiling bulkhead or a column could make it hard to build. Clear notes help Architectural Drafting Services teams show these limits correctly and prepare drawings that match what is really in the building. If your project needs well-organised layouts, Commercial Floor Plan Drafting Services can help turn your documented information into clear floor plans.
- Photograph and Annotate Conditions That Need Clarification
Photos can show things that numbers cannot. But they only help if they are organised. A random pile of pictures is hard to use. Each photo should match a clear spot in the building.
Here is a simple way to document with photos:
- Take wide shots of each room from clear, easy-to-find spots.
- Take close-ups of anything unusual.
- Capture visible structural and architectural features.
- Photograph ceiling and service conditions that matter
- Label each photo with the floor and room.
- Link photos to your field sketches or measurement notes
For example, if you photograph an existing wall opening, note which room it is in. If you can, also point to the matching measurement. This helps the drafting team understand exactly what they are looking at. Well-organised photos also help Architectural Drafting Services providers understand unusual site conditions without having to ask for more details again and again. Sketches are just as helpful. Use them for odd-shaped rooms, angled walls, offsets, or anything a photo cannot explain clearly.
- Check the Existing Drawings Against What’s Actually on Site
Original drawings are a good starting point, but don’t assume they show the building as it stands today. Renovations, repairs, and quiet changes nobody wrote down can all shift the layout. So take the drawings with you and compare them to what you see. It’s one of the best ways to end up with existing condition drawings you can trust.
What you need to check:
- Wall locations and thickness
- Door and window positions
- Room sizes and layouts
- Column and structural grid lines
- Stairs and corridors
- Ceiling heights and any changes you can see
- Existing openings and other building features
When something doesn’t match, log it in a discrepancy register. A simple one might look like this:
| Room 104 | Wall shown at 12 ft, measured at 12 ft 4 in | Recheck |
| Corridor A | Door shown at 3 ft, but the existing opening is different | Verify |
| Ceiling Zone B | No obstruction shown, but ductwork is visible | Document |
| Electrical Room | No layout available, and the room couldn’t be accessed | Investigate further |
The register has one job: make differences easy to spot, so guesses don’t sneak into the final drawings.
Sometimes the originals exist only on paper, or in old digital files that are a pain to work with. If that’s your situation, Converting Legacy Architectural Drawings into CAD walks through how to get older drawings ready for modern drafting. And if you need drawings of the verified, existing building, As-Built Drawing Services can prepare a set that matches the documented layout.
- Note the Visible MEP Conditions That Could Affect Your Renovation
Commercial renovations are rarely just about walls and floors. The building already has mechanical, electrical, and plumbing systems running through it. Even if your team isn’t doing the engineering checks, writing down what you can see helps catch problems early.
Record things like:
- HVAC supply and return vents
- Visible ductwork and mechanical equipment
- Plumbing fixtures and accessible connection points
- Electrical panels and other visible equipment
- Light fixtures and ceiling-mounted devices
- Visible fire alarm and sprinkler components
- Anything else that could affect the new layout
Say you’re planning to move a partition. It might land right under an air diffuser, or block access to an electrical panel. Catch that now, and the team has time to work around it.
One caution: what you see on site isn’t the whole picture. A visual observation doesn’t confirm what’s inside the walls or above the ceiling, and it doesn’t tell you whether a system can handle new loads. That’s a job for an engineer. What your team records can go to the right consultants so they can coordinate with the architectural drawings. It also tells your Architectural Drafting Services team where coordination may be needed before they start drawing.
- Record What’s Concealed, Unknown, or Inaccessible
One of the most useful things your team can do on site is be honest about what you can’t confirm. A visual inspection only shows so much. What’s behind a finished wall, inside a closed ceiling, or tucked behind equipment stays unknown until someone qualified opens it up.
Rather than guess, sort your observations into three categories:
| Verified | Directly measured or clearly seen | Measured wall location |
| Observed but unverified | Visible, but the full condition is unknown | Exposed pipe with an unknown route |
| Inaccessible or concealed | Couldn’t be inspected or confirmed | Services above a closed ceiling |
Mark each item’s category clearly in your field notes and on the drawings.
If something needs a closer look, say so. Tell the project team and bring in the right people. Structural checks, hazardous material surveys, and hidden MEP inspections belong with qualified professionals, not in the “we will assume it is fine” pile. This keeps unverified information from being treated as fact. It also gives your drafting team a clear view of what’s confirmed and what still needs follow-up before drawing production begins.
- Run a Quality-Control Check Before You Issue the Drawings
Before the drawings go out for review or coordination, give them a proper check. You’re looking at two things: whether the recorded information is correct, and whether the drawings agree with each other.
Your checklist:
- Check overall dimensions and every dimension string.
- Make sure room names and references match everywhere.
- Carefully check wall location, door location and window location.
- Review floor height and ceiling height.
- Confirm structural grid lines line up.
- Compare plans against the related sections and elevations.
- Check the visible MEP coordination notes.
- Flag anything unverified or unreachable.
- Make sure existing, demolition, and new work are easy to tell apart.
- Review drawing notes, revision references, and file organisation.
Your final review should also confirm that the drawings are honest about what isn’t known. If a measurement hasn’t been confirmed, don’t show it as if it has. Mark it clearly so nobody mistakes it for a verified number. A careful check like this is part of good Architectural Drafting Services, especially when there are many sheets and several consultants involved.
Hand Off a Complete Package to Your Drafting Team
A complete handover package helps the drafting team understand the project without having to keep chasing you for missing information.
Before you send anything over for drafting, pull together the following:
| Original architectural drawings | Gives the team an initial reference |
| Field measurement records | Shows the dimensions you measured |
| Marked-up sketches | Explains irregular conditions |
| Site photographs | Provides visual evidence |
| Room and area identification | Keeps building information organized |
| Discrepancy register | Flags where the information conflicts |
| Inaccessible-area notes | Records what you couldn’t inspect |
| CAD/BIM requirements | Sets expectations for production |
| Drawing standards | Keeps everything consistent |
| Project scope and deadline | Defines priorities and deliverables |
A clear handover cuts down on ambiguity and helps the drafting team plan their work. It also gives your Architectural Drafting Services provider a chance to spot missing information before production starts, rather than halfway through.
How Existing Conditions Documentation Supports Commercial Permit Drawings
Reliable existing-condition information can also feed into the permit drawing packages for commercial projects.
Depending on the scope and your local jurisdiction, that documentation may help you develop existing floor plans, demolition plans, proposed layouts, reflected ceiling plans, elevations, and sections.
Take a commercial tenant improvement. The project team may need to show the existing partitions, mark what’s being demolished, and lay out the new rooms. Depending on the work, accessibility, egress, fire and life-safety, structural, and MEP information may come into play as well.
That said, permit requirements vary from one jurisdiction to the next. Don’t assume a single drawing checklist works everywhere in the United States. Architects and project teams should confirm the submission requirements with the local building department.
Clear documentation gives your drafting team a stronger starting point for the architectural drawings the project needs. Still, the responsible design professionals should review the final permit documentation and coordinate it with the relevant authorities.
Give Your Drafting Partner a Clear Project Brief
When you’re working with an external drafting partner, give them enough information to understand what the project needs and prepare the right documents.
A useful project brief covers:
- Project location and building type
- Renovation scope and the areas involved
- Original drawings and any digital files you have
- Field measurements and marked-up sketches
- Photographs and site observations
- Existing conditions and any discrepancies still unresolved
- Required drawing sheets and deliverables
- Preferred CAD or BIM software and file formats
- Your company’s drafting standards and templates
- Submission deadlines and review requirements
McLine Studios supports architects, contractors, and commercial project teams with Architectural Drafting Services built around the information and documentation each project requires. When organised field records meet a structured drafting workflow, the drawings come out clearer, and the team stays better coordinated through renovation planning.
Conclusion: Build Your Renovation Drawings on Reliable Site Information
Good commercial renovation documentation starts with understanding the building as it actually is today. Reviewing the original drawings, planning site access, collecting field dimensions, taking photographs, flagging discrepancies, and documenting the areas you couldn’t reach all add up to a more dependable information base. The best process also separates what you’ve verified from what you’re assuming, and coordinates the architectural information with the building systems.
McLine Studios organised existing conditions drawings and a clear handover to your drafting team, you’re in a much better position to develop renovation drawings you can rely on for design coordination and the next stages of the project. Professional Architectural Drafting Services help turn well-organised site information into clear architectural documentation that supports your renovation goals. McLine Studiosworks with project teams to provide drafting support tailored to their scope, drawing requirements, and documentation standards.
Frequently Asked Questions
They’re drawings of your building exactly as it is today, made before anyone picks up a hammer. Walls, doors, windows, columns, floor levels, ceiling heights, and whatever building systems you can see all go on the page, so the architect and contractor are working from what’s really there.
Because old buildings rarely match their old plans. Walls shift, ceilings drop, and past remodels never get recorded. If you catch those surprises on paper, you fix them with an eraser. If you catch them on site, you fix them with change orders. It also means fewer guesses and fewer “wait, I thought that wall was here” conversations.
We start from something that won’t move, like a structural grid line, a fixed wall, or a known datum. Then we add up the small measurements and see if they match the overall one. Anything critical gets measured twice. And if the numbers don’t agree, we don’t pick the one that looks right. We write it down and ask.
Existing conditions drawings show what the building looks like now, for the scope of your renovation. As-builts usually record what was actually built once construction wraps up. People use the terms interchangeably all the time, so it’s worth agreeing up front on what you’re expecting and how thoroughly it needs to be verified.
We say so plainly. If we couldn’t get above a ceiling, into a locked room, or behind a wall, the drawings are marked as inaccessible, concealed, or unverified, with a note on why. If something needs a closer look later, we flag that too. What we won’t do is draw a guess and let it pass for a measurement.
Yes, if you can see them and they might affect the layout. That means exposed ducts, pipes, electrical panels, outlets, equipment, and anything running through the ceiling. What’s hidden inside walls or above finished ceilings shouldn’t be shown as confirmed unless there are reliable records or someone has actually investigated.
It gives your design team solid ground to start from. When everyone knows what’s already there, it’s much easier to show what’s changing and to spot problems before they reach the permit office. Just keep in mind that requirements vary by jurisdiction, building type, and scope, so check with your local authority about what they need.