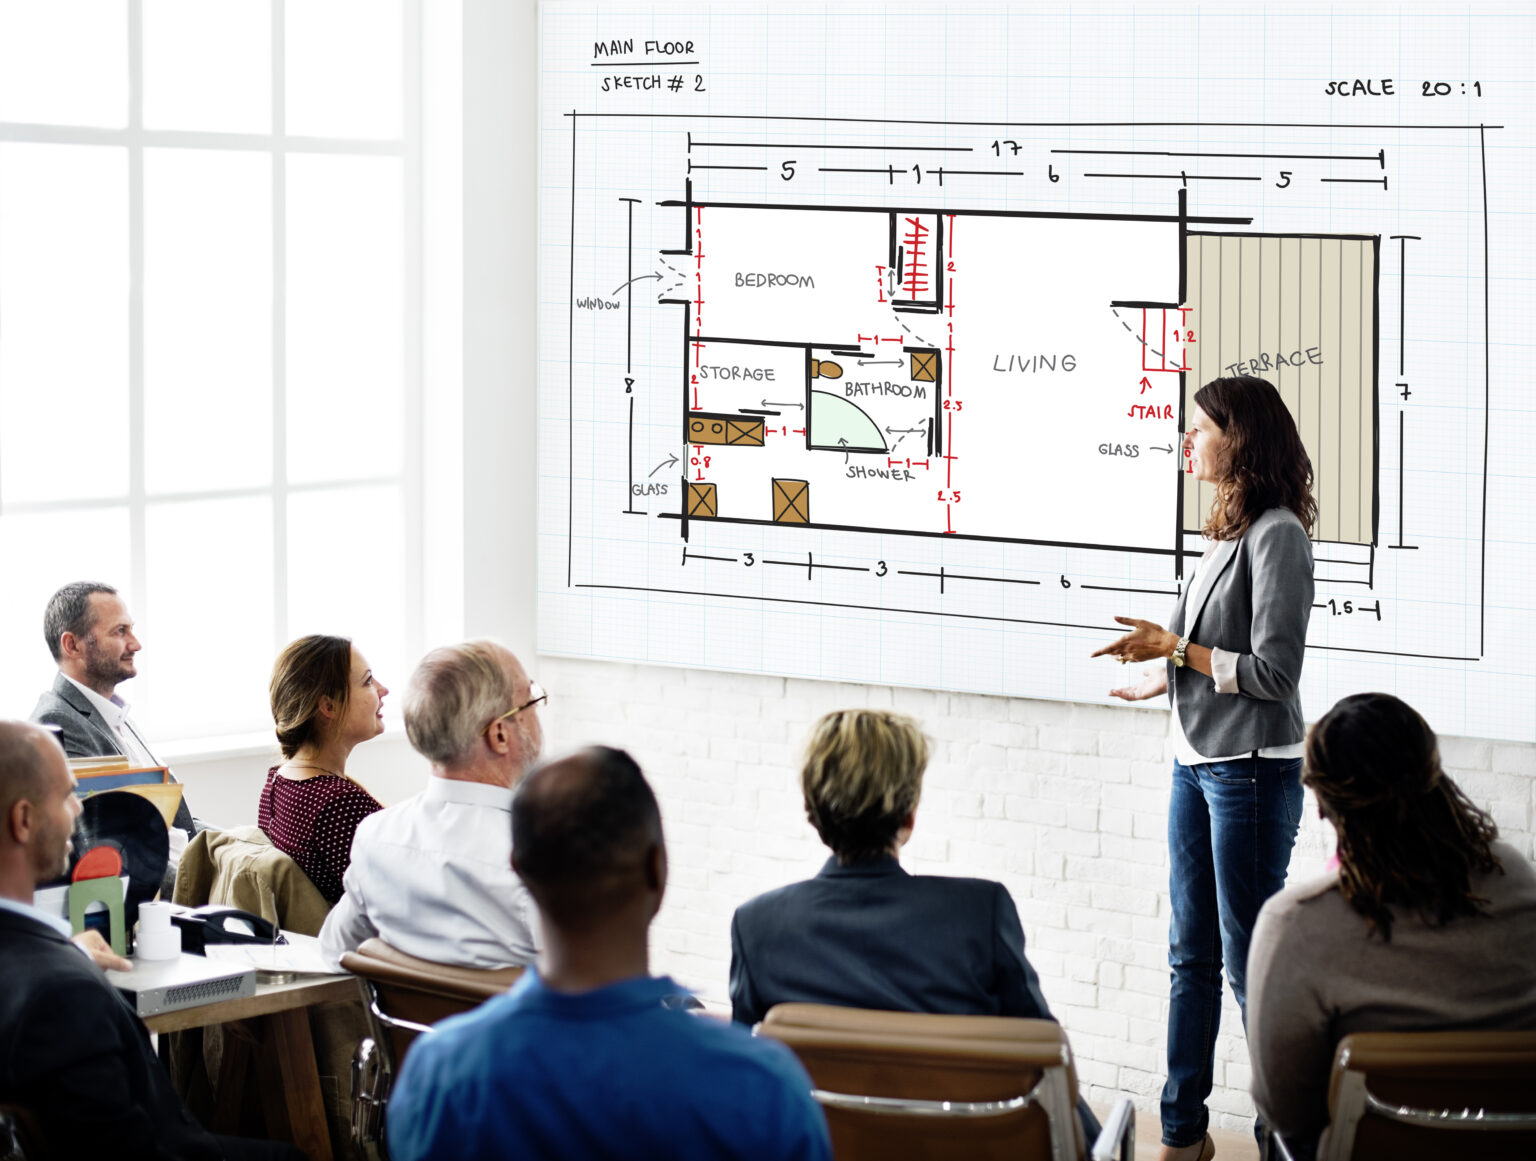
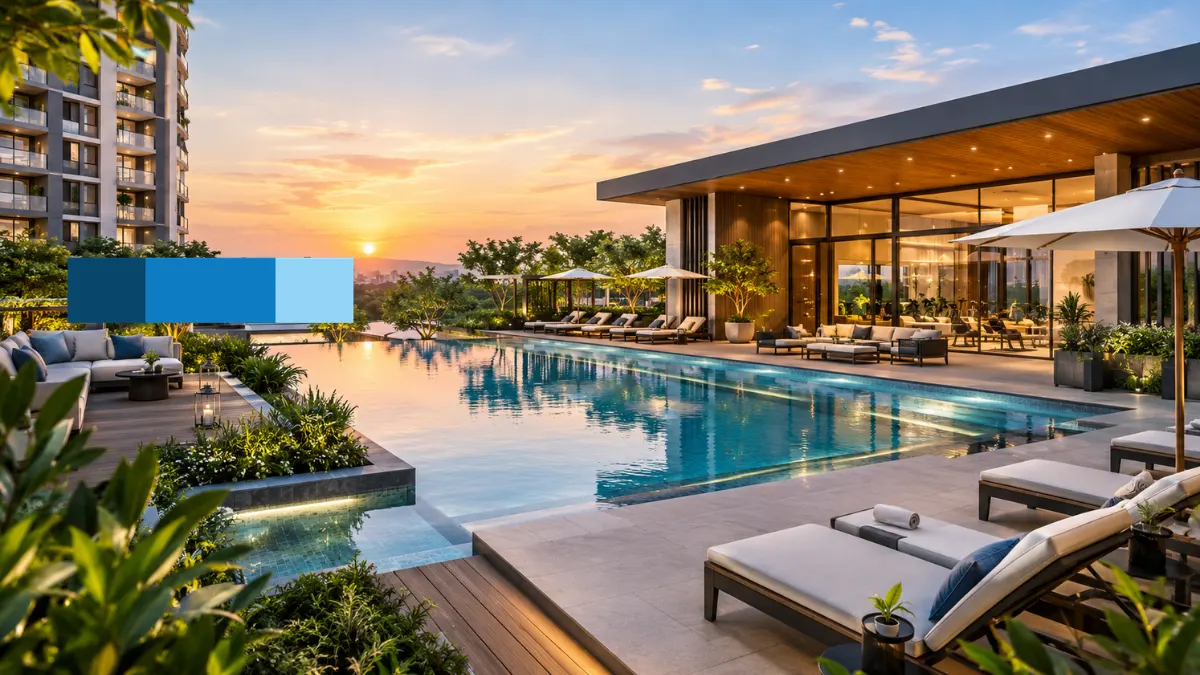
Sometimes, buyers struggle to picture a clubhouse based on a floor plan. Every dimension, equipment schedule, and door swing helps teams understand where things actually go. These plans often fail to show what it will feel like to walk into a lounge in the evening or how it is to step onto a pool deck at sunset. This gap matters the most for the developers, architects, and marketing teams, because it is the shared spaces that tell much about a property’s identity.
To counter these challenges, amenity rendering will come to the rescue. To translate plans, materials, furniture layouts, and lighting direction, 3D amenity rendering produces images that clearly communicate the atmosphere, layouts, and use of a space before its construction is even complete. When used strategically, real estate amenity rendering helps the design team with review and provides marketing with a clear picture to present.
In this article, we will understand how to plan amenity renderings, how to prioritize spaces, and how to choose views. We will understand how to make an image look believable and how to pitch a brief. For those who are comparing amenity rendering services, you can check out Mcline Studios’ 3D rendering projects for real estate.
What Is Amenity Rendering in Real Estate?
Amenity rendering provides a 3D visualization of different shared spaces like pools, clubhouses, lounges, fitness centers, courtyards, and rooftop terraces. It helps in understanding how the space is going to look after completion of the project and how people can utilize these spaces. And all this information is purely based on the project’s current design. The multifamily amenity rendering and residential amenity rendering provide a clear projection of spaces for apartment communities and master-planned neighborhoods, respectively.
How 3D Amenity Visualization Works
The process begins with source materials, then plans, reference images, material selections, furniture layouts, landscape information, and design directions. For amenity visualization, the team uses three dimensions to build up spaces, place furniture and other objects like planting, place materials, set the lighting, and create the camera views. Once done, drafts are reviewed as per the design team’s feedback, and, if required, changes are made before the final delivery.
What Makes Amenity Rendering Different From Standard Architectural Rendering?
A standard exterior rendering focuses on the building: massing, facade, and site context. Architectural amenity rendering applies the same discipline to shared spaces, but the goal is experience. Shared space rendering shows spatial relationships, furniture, circulation, lighting, finishes, landscaping, and human-scale details that help a viewer judge how a place will work and feel.
One boundary is worth stating early. A rendering communicates design intent. It is not a substitute for construction documents, technical approvals, or final as-built photography.
Why Real Estate Projects Need Amenity Rendering Before Construction
You know what’s the hardest part of a project to explain, and with just drawings alone, it is the shared spaces. The rendering done in the early stages will provide teams with three advantages.
Help Prospective Buyers Understand the Intended Lifestyle
Many buyers are not used to reading plans in detail. Where to place furniture, activity zones, different landscapes, and human-scale references allow them to interpret how a space can be used. It helps them imagine where people would gather, where they could sit quietly, and how one area connects to the next. Also, a clear rooftop lounge plan with defined seating clusters tells more about how the space could be used than just a paper image with a rectangle on a plan.
Support Design Reviews and Stakeholder Discussions
3D visualizations support project teams with shared references. Through this, architects, developers, and owners can discuss finish palettes, furniture placement, lighting direction and atmosphere, and spatial composition without any extra cost. A rendered view brings the issues to the limelight that may otherwise go unchecked on a plan, for example, if a seating area sits too close to a circulation path.
Prepare Marketing Assets Before the Space Is Built
Amenity renderings that are approved support the digital campaigns, brochures, pre-leasing materials, websites related to the project, and sales-center displays. This leads to marketing even before the project is completed. As we all heard, “a picture speaks a thousand words”; these renderings increase communication with investors and buyers.
Which Shared Spaces Should Real Estate Developers Prioritize?
It is not necessary to provide every type of rendering for every development. It is purely based on positioning, target audience, design maturity, and goals set for the marketing. In a luxurious property, there may be a rooftop terrace, and in a family-oriented community may be courtyards and play areas.
Clubhouses, Resident Lounges, and Multipurpose Rooms
The spaces defined in the rendering carry the social identity of a property. The rendering done for a clubhouse will showcase gathering areas, furniture groupings, and reception zones. The main objective is to convey scale and flow, how many people can gather comfortably in a room, and how it opens to other adjacent spaces.
Swimming Pools, Pool Decks, and Rooftop Terraces
Pool deck and rooftop views need to communicate water features, seating, shade structures, circulation, landscape edges, and surrounding views. Because these are often a project’s most photogenic spaces, accurate scale matters most here. A deck that looks generous in a stretched wide-angle image but feels tight in reality undermines trust.
Fitness Centers and Wellness Spaces
Fitness center rendering works when it explains function. Equipment layout, workout zones, mirrors, lighting, and circulation tell viewers whether the space supports strength training, group classes, yoga, or a mix. Wellness spaces such as spas and meditation rooms benefit from similar attention to atmosphere and material warmth.
Courtyards, Parks, and Community Recreation Areas
Outdoor areas depend on paths, planting, seating, children’s play zones, gathering areas, and their relationship to surrounding buildings. For broader grounds, Community Rendering can show how several spaces relate within the development, while community amenity rendering of a single feature focuses on one space in detail. The right choice depends on what the audience needs to understand.
How to Choose the Right Amenity Rendering Views for Your Project
The error starts with choosing views before defining the audience. Before selecting an image, start with the question that each image needs to answer.
Match Each View to Its Communication Goal
There are four different types of amenity views that cover most of your needs. The Lifestyle hero views convey mood and suit websites and brochure covers. The views that represent layout-oriented wide views give an explanation for arrangement and circulation. To showcase finishes and lighting, detailed interior views will help. To visualize how an amenity relates to the rest of the development, contextual views are used.
Choose Camera Angles That Explain the Space
The 3D visualization makes viewers imagine that they are standing in a space (not completed). It provides the whole layout. Detailing highlights materials and features, and enhanced views clarify the site relationships. However, be aware of the extreme wide angles because they can distort perceived scale and make the space look larger than it is.
Decide Whether Daylight, Dusk, or Multiple Views Are Needed
Daylight tends to clarify layout and finishes. Dusk can communicate lighting design and evening atmosphere. Commission multiple views only when each answers a distinct question. For understanding, let’s take an example: a wide daylight view of a pool deck can explain layout and seating, while a dusk view can show fixtures, firepits, and evening ambiance. When the amenity is indoors, such as a lounge or fitness room, 3D Interior Rendering is typically the relevant service, since interior views depend heavily on finishes, furniture, and lighting detail.
What Makes a High-Quality Amenity Rendering Believable?
Photorealism alone does not prove design accuracy. A believable rendering reflects the underlying design information, and the project team must review that information.
Accurate Materials, Textures, and Finishes
Material scale, reflectivity, wood grain, stone patterns, glass, paving, and water all affect credibility. Finishes should match the latest design direction. If a stone selection changes, the rendering should change with it.
Lighting, Shadows, and Visual Hierarchy
Daylight direction, fixtures, reflected light, and contrast guide where the eye goes. Good lighting establishes a focal point, such as a fire feature or a bar, and keeps secondary areas readable without competing for attention.
Realistic Furniture, Landscaping, and Human Activity
The placement of furniture should be based on the way people are going to use it. The people should be visible in a number that is not too many, doing different activities, and plants should reflect the real sense for the project. Generic props or crowded scenes make an amenity feel staged rather than usable.
Consistency Across the Rendering Set
If a difference in a design change is not documented, materials, furniture, landscape treatment, lighting mood, and design details should remain consistent across related views. If there is inconsistency between a lounge view and the lobby view, it will leave viewers with delusion.
How to Prepare an Amenity Rendering Brief
Without clear briefs revisions will go on continuously, and final images will not align with project goals. It is important that briefs must cover three areas.
Collect Plans and Available Design Information
Collect the reference images, plans related to landscapes, current documentation representing designs, floor plans, elevations, relevant sections, and CAD or BIM files. Make sure only to share recent versions, and take note of things if anything changes.
Confirm Materials, Furniture, and Project Direction
It is important to identify known finishes, furniture and equipment selections, lighting preferences, landscaping intent, and reference imagery. If there are undecided items, flag them so they are not mistaken for final selections.
Define the Audience, Views, and Deliverables
Provide proper information about the intended use. Give design review, investor presentation, pre-leasing, website, brochure, or other channels. Specify viewpoints, file formats, and delivery dates.
Things to remember for a rendering inquiry:
- Current plans, elevations, and sections.
- CAD or BIM files, if available.
- Material and finish selections, with open items flagged.
- Furniture, equipment, and lighting references.
- Landscape plans or planting intent.
- Target audience and where images will be used.
- Number and type of views needed.
- Output formats and delivery dates.
- Review contacts and approval process.
Once the brief is in place, the next step is a project-specific scope. You can explore the Amenity View Service to see how McLine Studios approaches amenity visualization and what information helps start a conversation.
How to Evaluate an Amenity Rendering Service Provider
The right provider depends on project needs rather than a single price point. When reviewing amenity rendering services, four areas are worth checking.
Review Relevant Project Experience
Look for work involving similar amenity types, property formats, visual styles, and audience requirements. A provider experienced with multifamily clubhouses may handle a rooftop terrace very differently from one whose portfolio is mostly single-family exteriors.
Understand the Scope and Revision Process
Establish what is included: number of views, output formats, assumptions, review milestones, and how requested changes are handled. Clear answers up front prevent surprises later.
Check Design Alignment and Communication
A good process includes sharing updated source files, resolving conflicting instructions, confirming design changes, and reviewing images against approved information. Ask how the provider handles a finish change that arrives mid-project.
Compare Deliverables, Not Just Price
Assess the number and purpose of views, level of detail, workflow, and fit with intended channels. A lower quote for fewer or less detailed views may not be comparable to a broader scope.
McLine Studios offers project-specific amenity visualizations and encourages teams to review the scope and discuss requirements. If your project also needs exterior, interior, or marketing imagery beyond amenity spaces, McLine Studios’ Real Estate Rendering capabilities may be a useful reference point.
How Amenity Renderings Fit Into a Real Estate Marketing Package
Amenity images work best as part of a coordinated visual set rather than standalone assets.
Build a Consistent Visual Story Across the Development
Amenity images complement building exteriors, residential interiors, and wider community views. When lighting style, color treatment, and level of detail stay consistent, the full set reads as one development rather than a collection of unrelated images.
Match Image Formats to Their Intended Channels
Website hero images, listing galleries, brochures, and social or presentation assets each have different size and cropping needs. Decide where each image will appear before rendering, so the composition leaves room for cropping and text overlays.
Keep the Visual Package Aligned With Current Design Information
Set a review checkpoint whenever finishes, furniture, landscape elements, or layouts change. Outdated marketing images can create mismatches between what was shown and what is built. For teams planning the full visual package, McLine Studios’ 3D Rendering Services cover related visualization needs.
Common Amenity Rendering Mistakes to Avoid
- Selecting views before defining the audience or purpose. Start with who the image is for and what it needs to explain.
- Showing too many amenities without prioritizing. Focus on the spaces that differentiate the property.
- Using distorted camera angles. Choose lenses and positions that keep proportions believable.
- Adding generic people, furniture, or props. Match them to the intended use of the space.
- Showing outdated finishes or inconsistent design decisions. Review each view against current selections.
Ordering images without confirming where they will be used. Define channels and formats first.
Conclusion
Effective amenity rendering helps real estate teams communicate shared spaces, design intent, and the intended resident experience before construction is complete. It depends on deliberate view selection, clear project information, and review against current design decisions. To discuss your plans and deliverables, explore McLine Studios amenity rendering services and talk with the team about your project’s requirements.